How to Use Headings (H1, H2, H3)
What You’ll Learn
How to add and organize headings (H1, H2, H3) in the Morweb content editor so your pages are clear and easy to navigate.
Why It Matters
Headings act like chapter titles in a book. They help visitors scan your page, find what they need quickly, and improve your site’s search ranking.
Step-by-Step Instructions
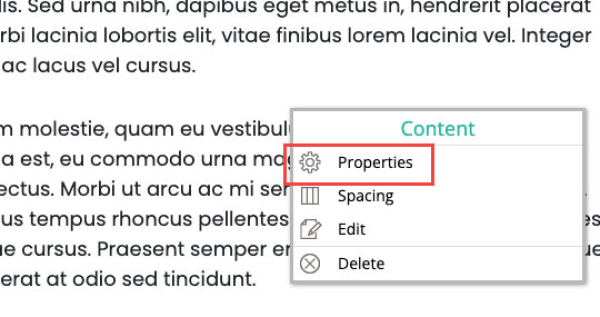
1. Open the Properties Panel
- Right-click anywhere in the content area where your text is located.
- Click Properties in the dropdown.
2. Select the Text
- Click and drag to highlight the text you want to turn into a heading.
3. Apply the Heading Style
- In the Properties panel, locate the Headings dropdown.
- Select the appropriate heading style: H1 (main title), H2 (section title), or H3 (subsection).
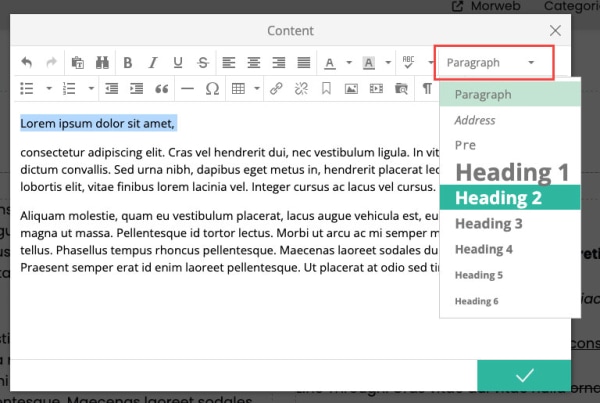
4. Choose your heading level
- Click the Text Style dropdown in the toolbar (it may show “Normal”).
- Select:
- Heading 1 (H1) for your page title—only one per page.
- Heading 2 (H2) for each main section.
- Heading 3 (H3) for subsections under an H2.
Troubleshooting Tips
- Accidentally used two H1s
Edit one of them back to H2. Remember: use only one H1 per page for a clear structure.
- Screen reader skips sections
Check that you haven’t jumped from H2 to H4—always descend one level at a time (H2 → H3 → H4).