How to Upload an Image in a Gallery
What You’ll Learn
How to add a new image to your website’s image gallery using the Gallery Module.
Why It Matters
Keeping your gallery up to date helps your visitors visually connect with your mission, events, and community impact. It only takes a few clicks to keep things fresh.
Step-by-Step Instructions
1. Go to the Gallery Module
- From your Morweb dashboard, hover your mouse on Site.
- Select Media from the dropdown menu.

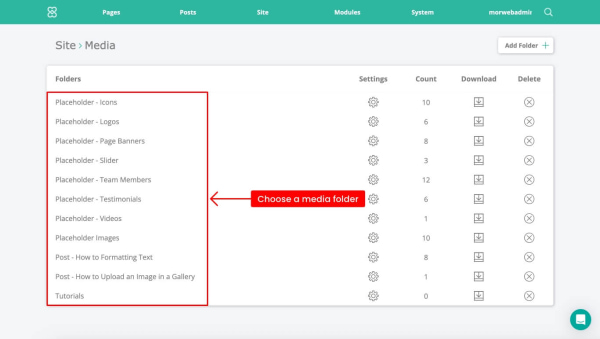
2. Choose the Media Folder
- Find the folder where you want to upload an image.
- Click the folder name.
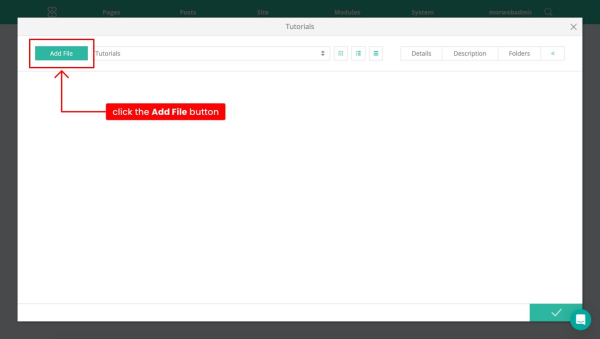
3. Click ‘Add File’
- Inside the popup dialog, click the Add File button.
- The image upload window will appear.
4. Upload Your Image
- Click Upload to select an image from your computer.
- Or drag and drop the image into the upload area.
- Accepted image formats:
.jpg,.png.
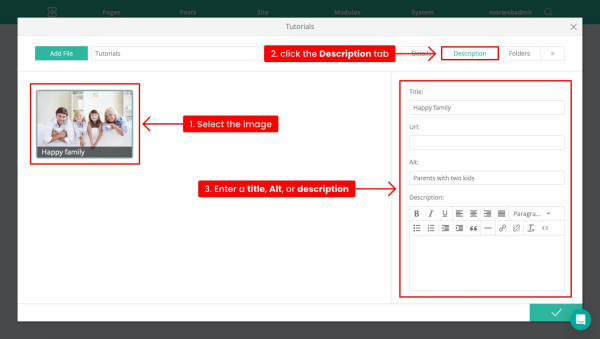
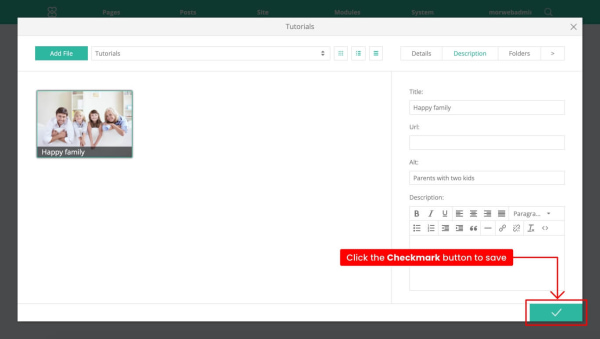
5. Add Image Details (Optional)
- Select the image and click the Description tab on the right side.
- Enter a title, Alt, or description for your image.
- These details improve accessibility and help with SEO (search engine optimization).
6. Save Your Changes
- Click Checkmark button to save and publish the new image.
Troubleshooting Tips
- Image not uploading?
Make sure the file is in a supported format like JPG, PNG.
- Upload button not responding?
Try refreshing the page or clearing your browser’s cache.
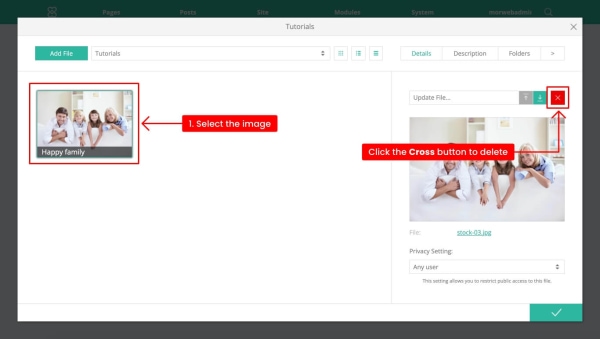
- Uploaded the wrong image?
Use the cross icon next to the image to delete it from the album.