How to Optimize Images for Faster Load Times
What You’ll Learn
How to prepare and add images to your website so pages load quickly and look great.
Why It Matters
Large or unoptimized images can slow down your site, especially on mobile devices. A slow site can frustrate visitors and hurt your search engine ranking. Optimizing images helps your site load faster and keeps users engaged.
Step-by-Step Instructions
1. Choose the Right File Format
Different image formats work best for different types of images:
- JPG/JPEG: Great for photos. Small file size, good quality.
- PNG: Best for images with transparency or simple graphics like logos.
- GIF: For simple animations or low-color images (use sparingly).
2. Resize Images Before Uploading
Don’t upload huge images and scale them down on the site. Resize them to the maximum size they’ll appear on the page.
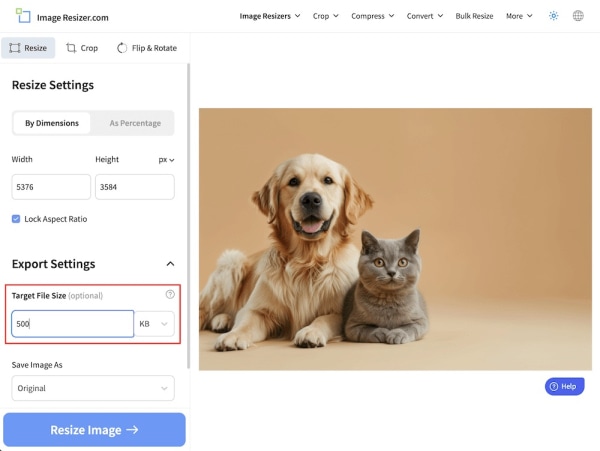
- If your image displays over 2500px pixels wide, resize it to that before uploading.
- Tools to resize:
- Mac: Preview app
- Windows: Paint or Photos app
- Online: imageresizer.com
Best Practices for Image Size: Keep file size under 500 KB (ideal range is 100–300 KB) for most images. Large images slow your site down.
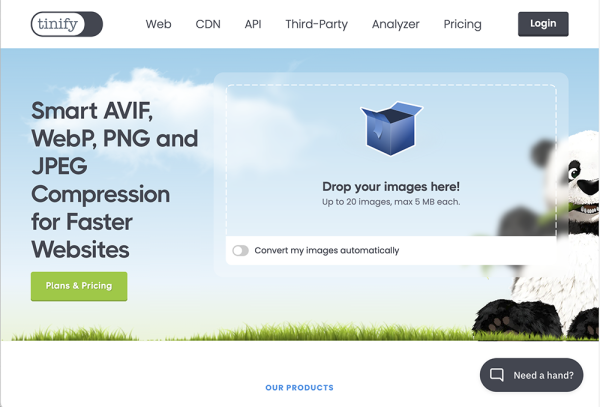
3. Compress Images Without Losing Quality
Compression reduces file size with little to no visible change.
- Free tools:
- TinyPNG
- ImageOptim (for Mac)
- Squoosh
Drag and drop your image into one of these tools, download the compressed version, and upload that to your site.
4. Use Descriptive File Names
Name your files clearly (e.g., team-photo-2024.jpg instead of IMG_8392.jpg). This helps with SEO and organizing files.
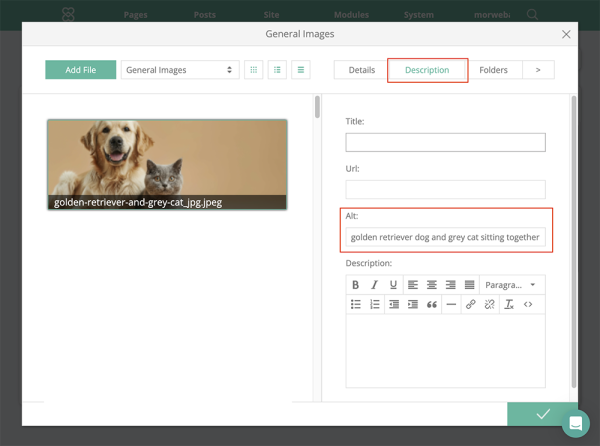
5. Add Alt Text When Uploading
Alt text is a short description of the image. It helps screen readers and improves accessibility and SEO.
Example: For a photo of your team, use: “Team Morweb smiling in front of the office”
Troubleshooting Tips
- Image looks blurry on the site?
You may have resized it too small. Try a slightly larger version. - Page still loads slowly?
Check if multiple large images are loading at once.