How to Upload and Link PDFs and Other Documents
What You’ll Learn
You’ll learn how to upload documents (like PDFs) to Morweb, link them in text or buttons, and use templates to display files or embed PDFs.
Why It Matters
Adding and linking documents lets you share important resources with visitors, making PDFs and files easy to find, download, and view directly on your site.
Step-by-Step Instructions
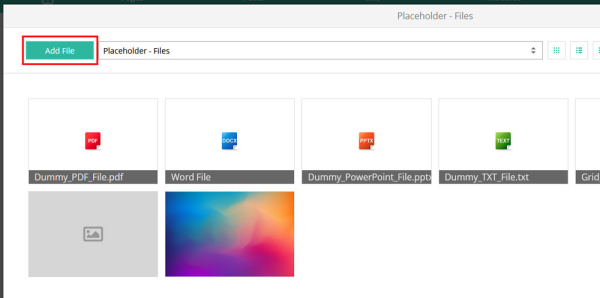
1. Upload Your Document
- Open the Morweb CMS backend and navigate under Site → Media.
- Open the folder where you want to add the file, then click the Add File button in the top left.
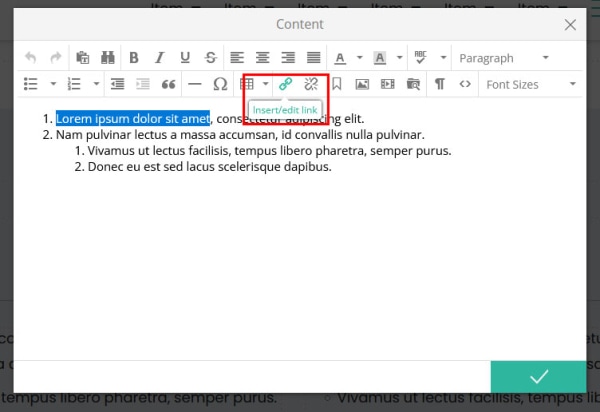
2. Link Your Document to Text
- Select the text you want to link in the content editor, then click the Insert/Edit Link button.
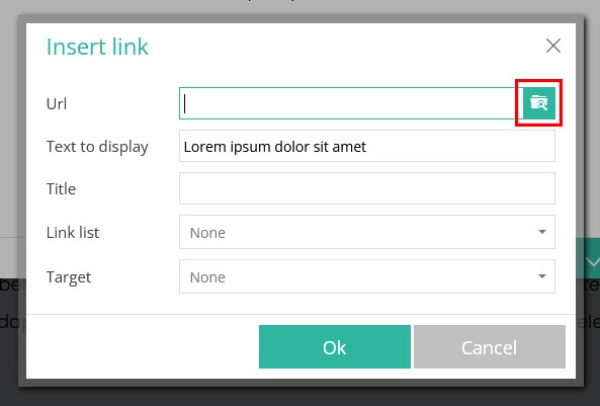
- Click the search icon next to the URL field, choose your uploaded file, and click OK to save.
3. Link Your Document to a Button
- Open the button’s settings in the page editor.
- Click the three dots icon next to the Select Link dropdown and choose your file.

4. Display a List of Files
- Add a Gallery widget to your page.
- Select one of the Files List templates to show your documents as a list.

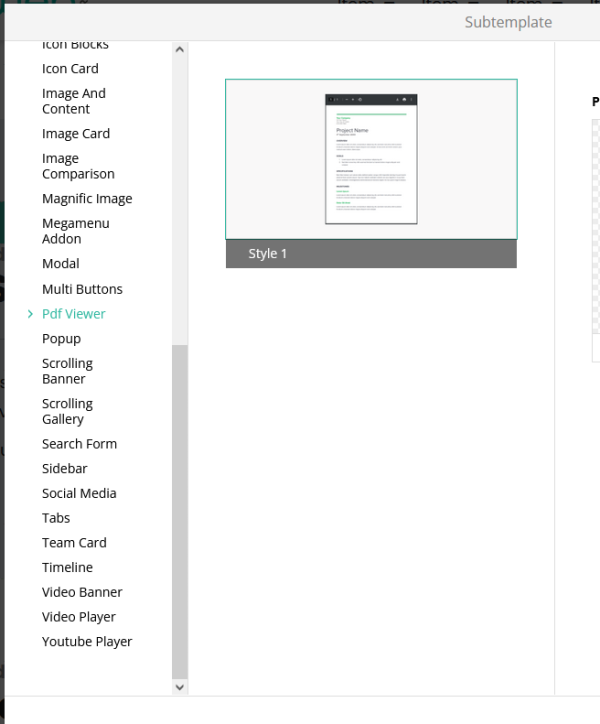
5. Embed a PDF Viewer
- Add a Subtemplate widget to your page.
- Select the PDF Viewer template to embed your PDF directly on the page.
Troubleshooting Tips
- Add File button not visible
Ensure you’re inside a folder view under Media. If you’re at the root Media page, click into a specific folder first.
- Document not listed in link search
Confirm you uploaded the file to the correct folder and refreshed the editor before opening the link dialog.
- Files List or PDF Viewer templates missing
Your site design may not include these templates. Contact your Project Coordinator to enable the Files List or PDF Viewer templates.