How to customize button colors, styles, and sizes
What You’ll Learn
You’ll learn how to change a button’s color, template style, size, and layout using Morweb’s customization tools.
Why It Matters
Customizing your buttons helps match your website’s branding and improve visual hierarchy. A well-styled button can increase click‑through rates and make your CTAs more effective.
Step-by-Step Instructions
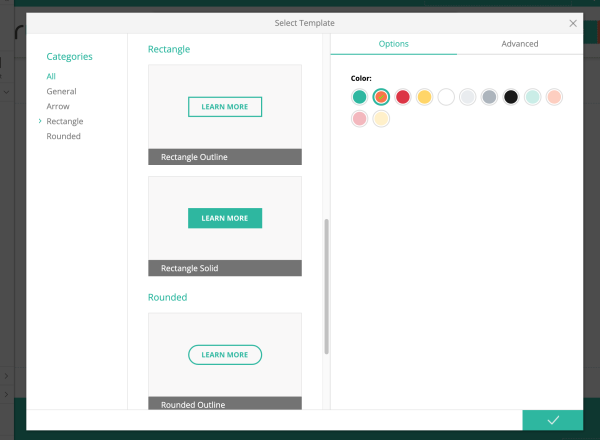
1. Change Button Style and Color
- Click the Template tab in the button editor.
- Select a Template thumbnail to apply a predefined style.
- Choose a color from the available theme palette.
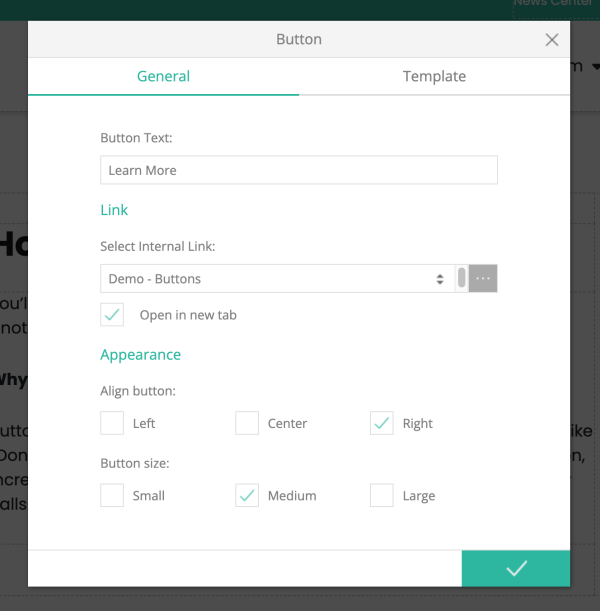
2. Adjust Button Size and Layout
- Go to the General section of the editor.
- Select options such as Small, Medium, Large, or Align Left.
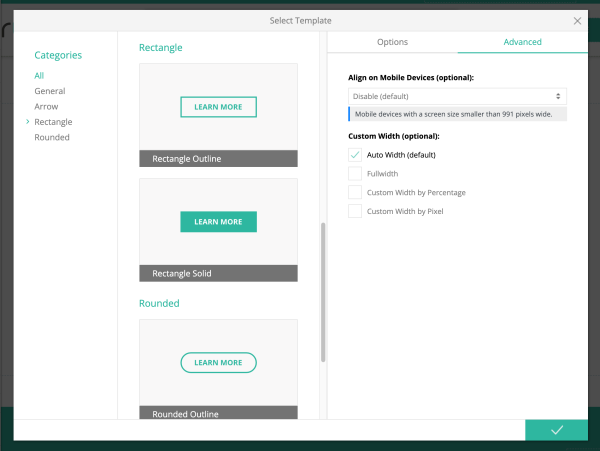
3. Use Advanced Settings (Optional)
- Open the Advanced Settings panel if available.
- Adjust features like:
- Custom width or auto width
- Custom width by percentage or by pixels
4. Edit or Update Later
- Right-click the button area and select Properties.
- Update text, style, alignment, or link settings as needed.
Troubleshooting Tips
- Style Changes Not Showing?
Make sure you've saved your edits and are previewing or viewing the published page.
- Template Options Missing?
Some themes may have limited button templates. Contact Morweb support if needed.
- Layout Looks Off?
Use the advanced settings panel to fine‑tune spacing and alignment.