Overview of Form Management in Morweb
What You’ll Learn
You’ll learn how to use Morweb’s Forms module to create, manage, and embed forms on your website, as well as how to handle submissions and customize form behaviors.
Why It Matters
Forms are essential for gathering user information, registrations, feedback, and more. Understanding how to create and manage forms ensures your website can interact effectively with your audience, collect data securely, and provide a seamless experience for visitors.
Step-by-Step Instructions
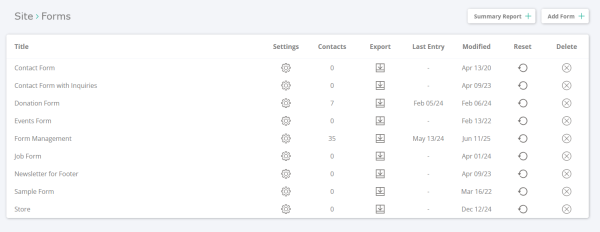
1. Go to The Forms Section
https://siteurl.com/site/intouch/contacts
- Hover over the top navigation menu and click Site > Forms.
- From here you can manage, create and review form data

2. Understand the Forms Dashboard
- Form Lists – Shows all your forms with quick access to settings, contacts, reports, etc.
- Form Data – Displays individual form submissions (like names, emails, and other details).
- Form Creation – Where you build or edit a form.
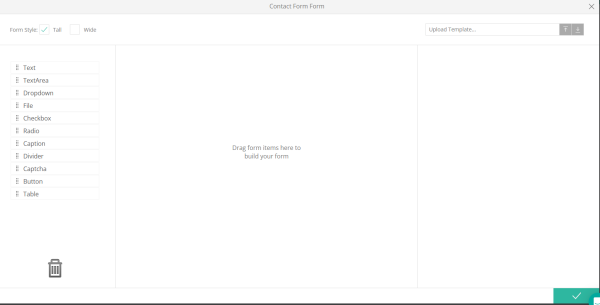
3. Create or Update a Form
- Click Add Form (top right of the Forms page).
- Use the drag-and-drop builder to design your form:
- Text – for short responses (e.g., name)
- Text Area – for longer responses (e.g., comments)
- Dropdown – users select one option
- Checkbox – for multiple selections
- Radio – for a single selection in a list
- File – lets users upload documents or images
- Button – submits the form
- Arrange fields as needed.
- Save
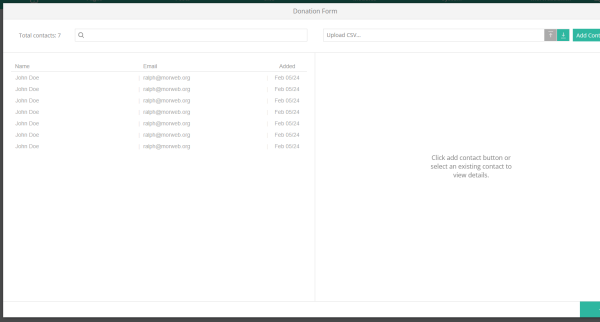
4. Manage Form Submissions
- Go back to Form Lists.
- Click the form name to see submissions.
- Here you can:
- View full submission data
- Export data as CSV
- Search and filter entries
- Add contacts manually if needed
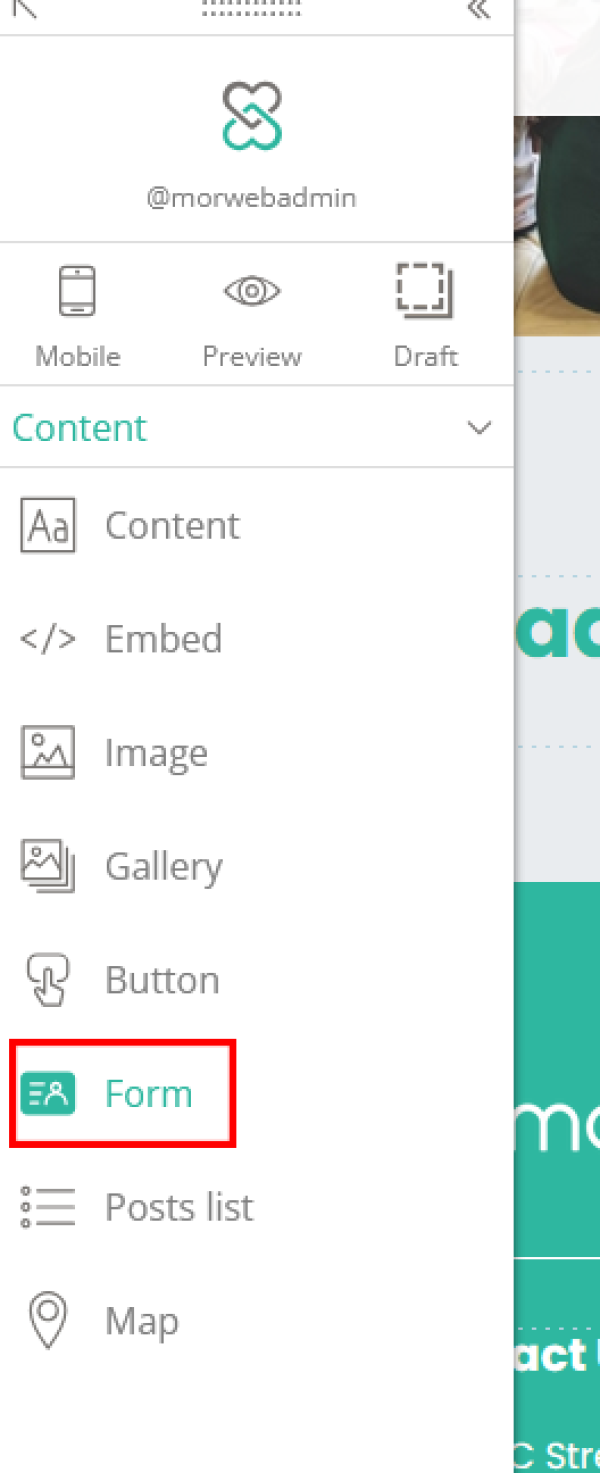
5. Add the Form to a Page
- Drag and drop the Forms widget onto your page
- Select the form you would like to use, and add a message to appear after the user submits the form, or redirect to a Thank You page.
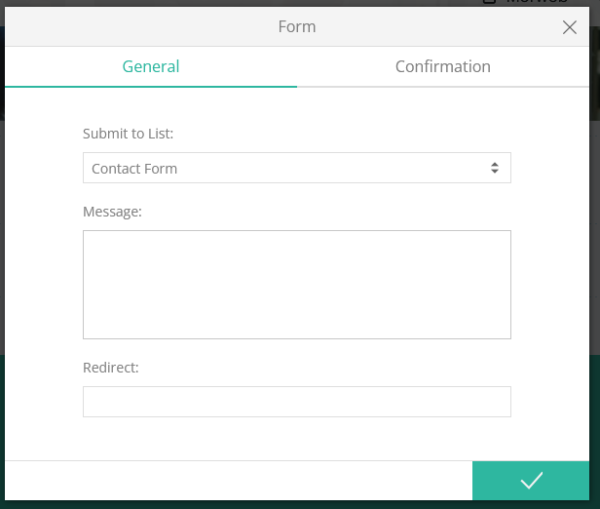
6. Customize Optional Variables (Advanced)
After adding your form to a page, you can customize:
- Message – Text users see after they submit
- Redirect – Send users to a thank-you page
- Confirmation Email – Automatically send an email with a summary of their submission