Creating Pop-Ups for Promotions and Announcements
What You’ll Learn
You’ll learn how to add and customize a popup message on a specific page using Morweb’s subtemplate tool.
Why It Matters
Popups are a great way to highlight important announcements, promote events, or collect email signups. Customizing them ensures they match your site’s design and purpose.
Step-by-Step Instructions
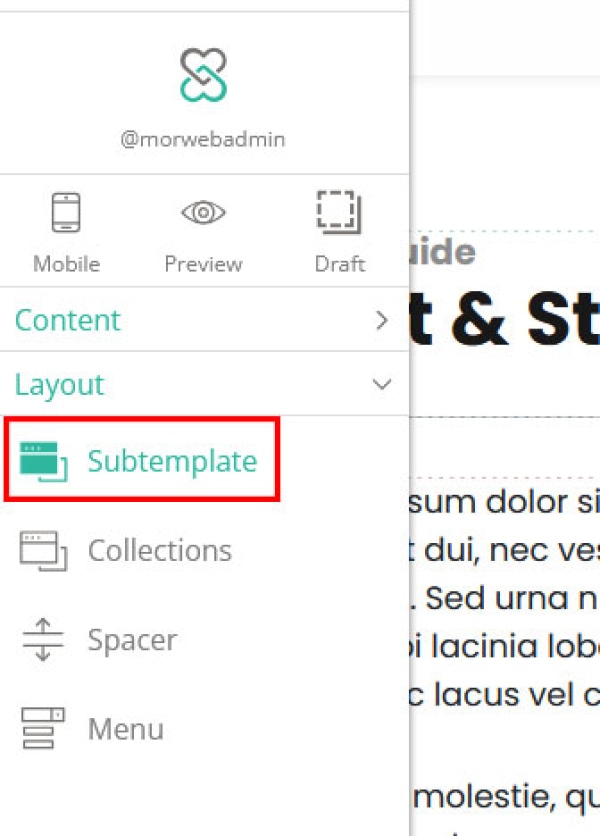
1. Add the Subtemplate Widget
- Log in and go to the page you want to edit.
- Drag and drop the Subtemplate widget into the section where you want the columns to appear.
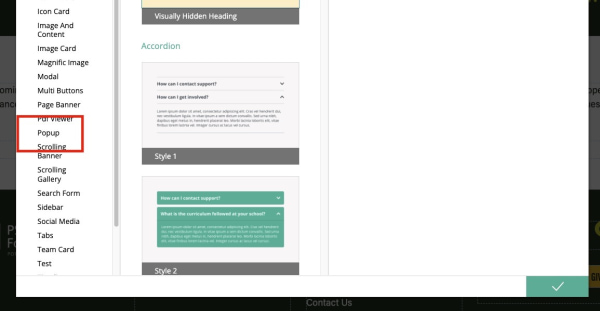
3. Select the Popup Subtemplate
- After placing the subtemplate, select Popup from the list of subtemplate options.
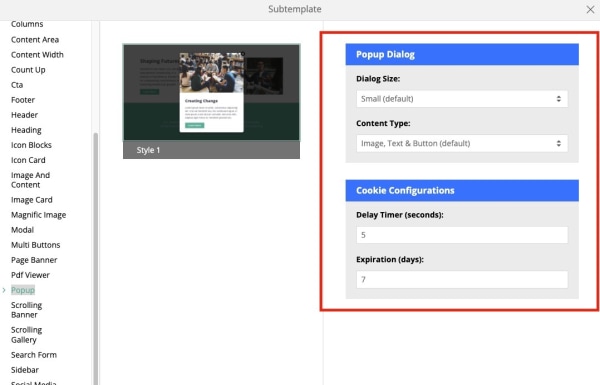
4. Customize Popup Settings
- Select the subtemplate you want to use.
- On the right side of the screen, adjust the following settings:
- Dialog Size: Controls how large the popup window appears.
- Content Type: Choose what kind of content to display (text, images, etc.).
- Cookie Configuration: Set options like delay time (how long to wait before showing the popup) and expiration (how often it shows to users).
5. Finalize and Activate the Popup
- When all settings are complete, click the checkmark icon at the bottom-right to save.
- The popup will now appear on the page as configured.
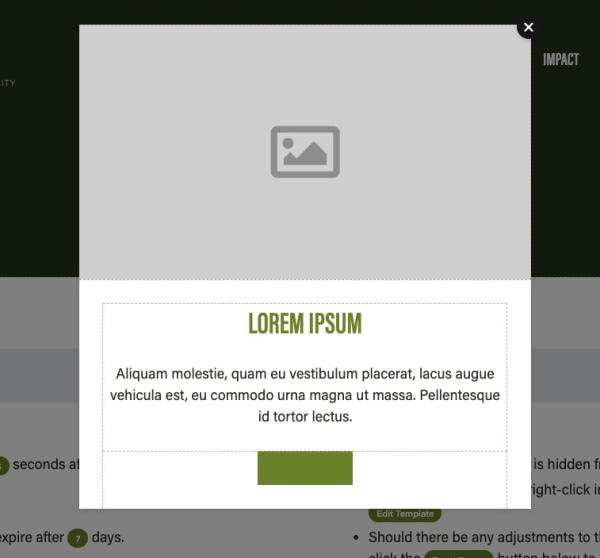
6. Add Your Content
- Inside the popup area, you can now add content such as:
- Images
- Text
- Call-to-action button
- Once you’ve finished adding your content, close the editor and refresh the page to see your popup in action.
Troubleshooting Tips
- Popup isn’t appearing?
Check the cookie settings—if the delay or expiration is too long, the popup may not show during testing. Try clearing cookies or using an incognito window.
- Can’t see the Style options?
Make sure you’ve selected the popup subtemplate and clicked directly on the Style box in the middle of the popup section.
- Popup not saving?
Be sure to click the checkmark in the bottom-right corner to save your changes. Refresh the page after saving.