How to Use Content Areas
What You’ll Learn
You’ll learn how to add and customize content areas to structure your website pages effectively.
Why It Matters
Content areas are the backbone of your page design. They help divide your page into sections, set background colors, control spacing (margins and padding), and organize your content for a clean, professional look. Using them correctly ensures your content is easy to read and visually appealing.
Step-by-Step Instructions
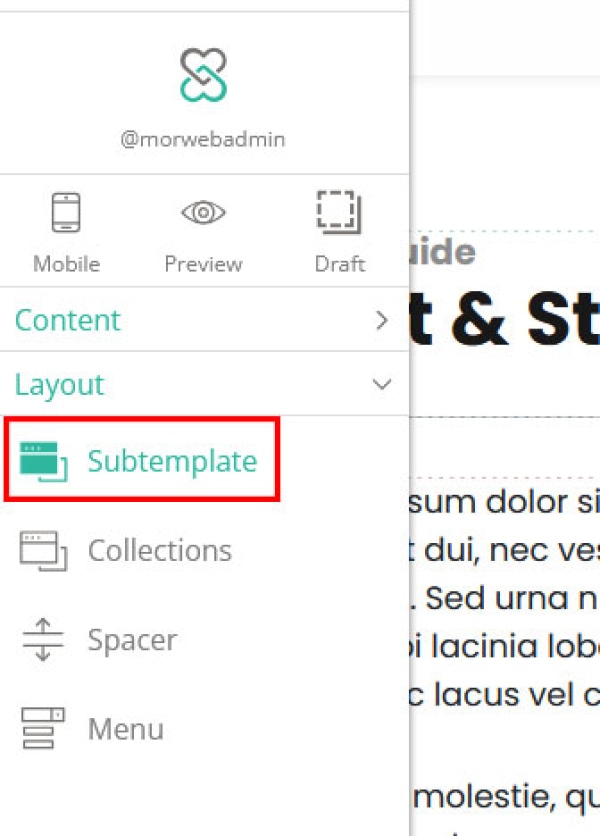
1. Add a Content Area Subtemplate
- Drag and drop the subtemplate widget onto your page.
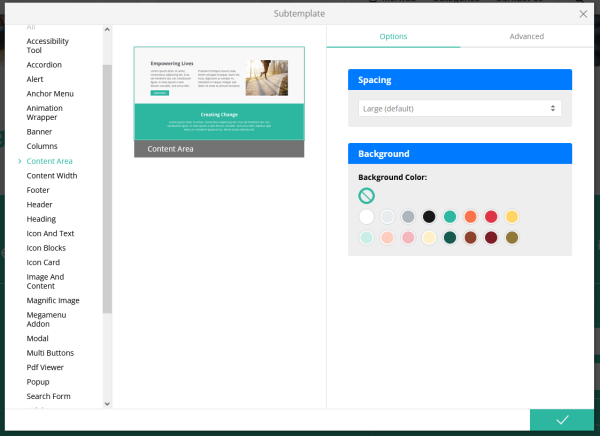
- Select Content Area from the categories on the left.
- Choose your Content Area subtemplate from the middle column.
- On the right, select the color and spacing you want on your content area.
2. Add Content to Your Content Area
You can now insert other widgets inside your new content area, including:
- Text blocks
- Images
- Buttons
- Columns
- Other widgets like forms, cards, or banners
Troubleshooting Tips
- Can’t drag widgets into the content area?
Make sure you’ve selected the Layout section and that your page is not locked or restricted.
- Spacing looks off?
Double-check the Spacing setting in the Options panel and make sure padding isn’t stacking from adjacent content areas.