How to Create a Blog Post in Morweb
What You’ll Learn
How to create, format, and publish a blog post in Morweb using the built-in blog editor.
Why It Matters
Publishing blog content helps your organization share updates, tell stories, and improve SEO. Morweb’s blog module makes it easy to create rich, engaging posts without technical expertise, allowing you to keep your audience informed and connected.
Step-by-Step Instructions
1. Access the Blog Section
- Log in to the backend of your Morweb website.
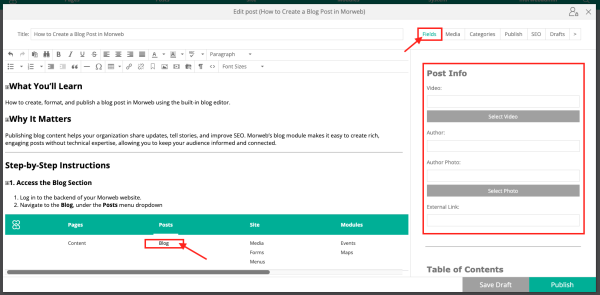
- Navigate to the Blog, under the Posts menu dropdown

2. Add a New Post
- Click on Add Post.
- Enter the title of your post and add your content to the body.
- Format your content using Morweb's text editor.


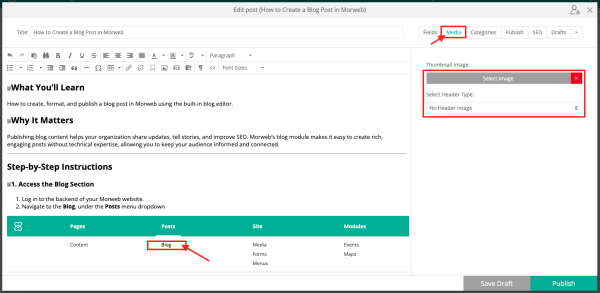
3. Add a Featured Image
- Select the Media tab in the top right corner of the blog editor.
- Choose a Thumbnail image and a Header image (they can be the same).
- It is recommended that your header image be at least 1000px wide.
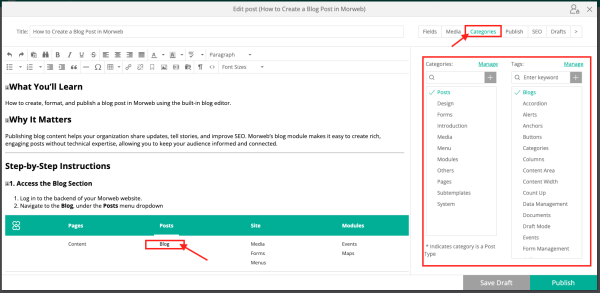
4. Assign Categories and Tags
- Select your categories and/or tags for your blog post.
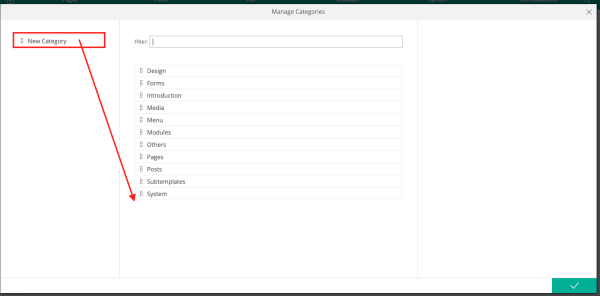
- To add a new category, click on Manage.
- Click New Category, enter a title, and save.
5. Set Publishing Options
- Choose to publish your post immediately or schedule it for a later or previous date.

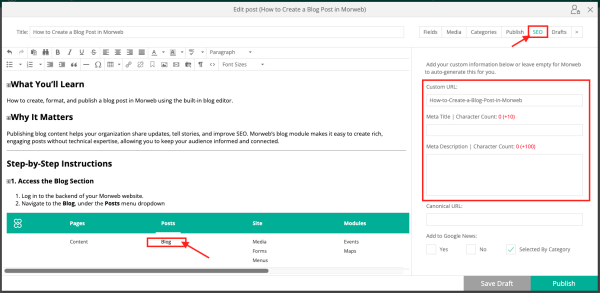
6. Optimize for SEO
- Fill out fields for SEO, including a custom URL, meta title, and meta description.
7. Fill Out Custom Fields
- Complete any custom fields specific to your site, such as author name, author photo, or external link.
- To request additional custom fields, contact your Project Coordinator or support@morweb.org.
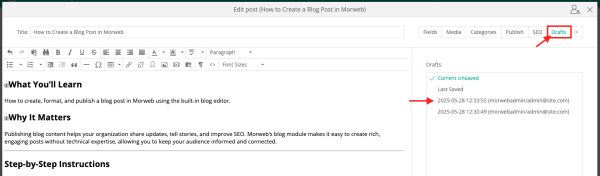
8. Revert to a Previous Draft
- Morweb's blog editor automatically saves previous versions of your post.
- To revert to a previous draft, click the Drafts tab and select the desired version.
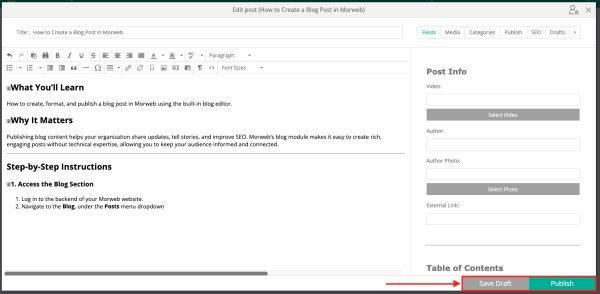
9. Publish or Save as Draft
- Click Save Draft if you don't want to publish right away.
- Click Publish to publish your post according to your publishing settings.
Troubleshooting Tips
- Images not displaying correctly?
Ensure your header image is at least 1000px wide and properly uploaded in the Media tab.