Scheduling Blog Posts for Future Publication
What You’ll Learn
How to schedule a blog post in Morweb for future publication.
Why It Matters
Scheduling blog posts in advance allows you to maintain a consistent content calendar, align posts with upcoming events or campaigns, and reduce last-minute publishing stress. Morweb's scheduling feature helps you plan ahead and keep your audience engaged.
Step-by-Step Instructions
1. Access the Blog Section
- Log in to the backend of your Morweb website.
- Navigate to Blog under the Posts menu dropdown.

2. Create a New Post
- Click on Add Post.
- Enter the title and content of your blog post using the Morweb editor.


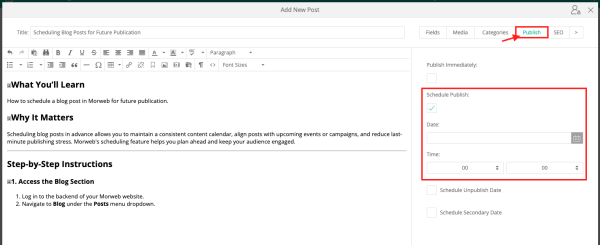
3. Set the Scheduled Publishing Date
- Click on the Publish tab at the top of the editor window.
- Select the Schedule option.
- Choose the future date and time you want the blog post to go live.
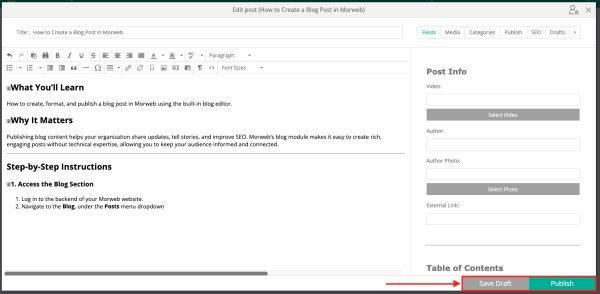
4. Publish the Post
- Click Publish to confirm the scheduled post.
- You can also click Save Draft if you want to come back and finish editing before scheduling.
Troubleshooting Tips
- Can’t find the scheduling option?
Verify that you’re in the Publish tab. If the option is missing, check your user permissions or contact your administrator.
- Need to change the scheduled time?
Reopen the post, adjust the publish date and time, and click Publish again to save the changes.