How to Create an Image Gallery in Morweb
What You’ll Learn
How to create an image gallery in Morweb by uploading images and displaying them in an attractive, responsive layout on your page.
Why It Matters
Image galleries visually showcase your organization’s work, enhance page engagement, and make your site more dynamic by allowing visitors to explore key visual content.
Step-by-Step Instructions
1. Prepare the Image Gallery
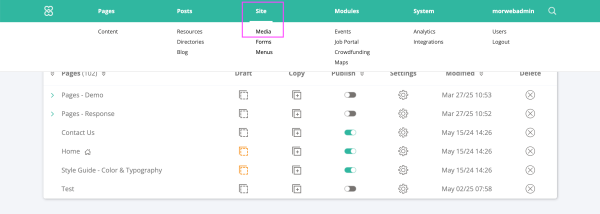
- Hover over the top navigation menu and click Site > Media to open the Media Manager.
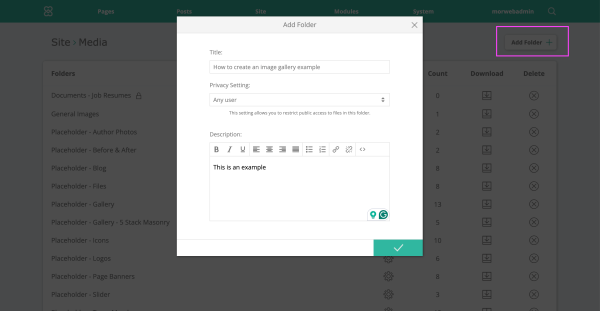
- Click the image folder you want to use for the gallery, or click the Add Folder button in the upper-right corner to create a new one.
- Name the folder, set privacy settings, and add a description if needed.
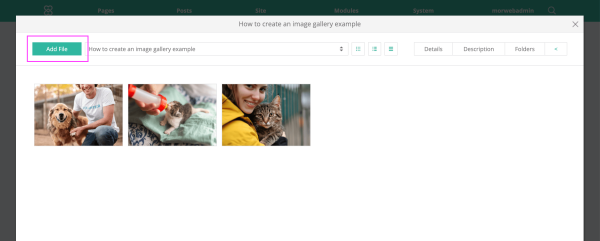
- In the pop-up window, click the green Add File button to upload images. You can select multiple images at once.
- Click the green Save button in the lower-right corner when you have finished uploading.
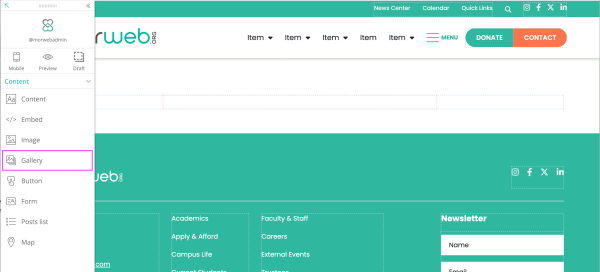
2. Insert Gallery Block
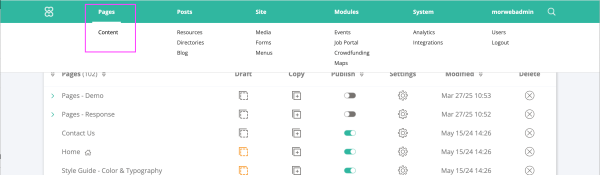
- Hover over the top navigation menu and click Pages > Content to open the Page Manager.
- Locate the page where you want to add the image gallery.
- Click the Page Name to open the visual editor for the selected page.
- Drag the Gallery element from the toolbar into your desired section of the page layout.
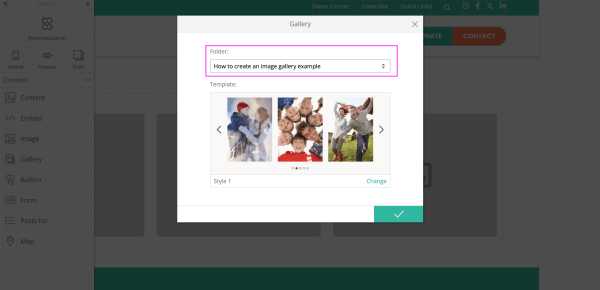
- In the popup window, select the folder you just added, choose your preferred style, then click the green Save button.
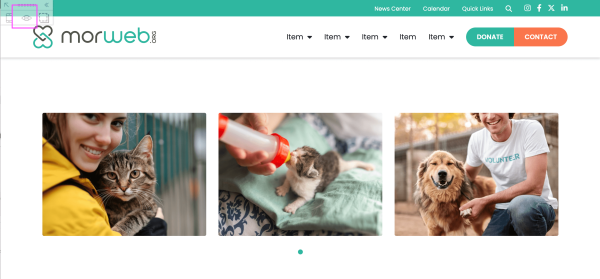
- Preview the new gallery to confirm it displays as expected.
3. Adjust the Image Gallery
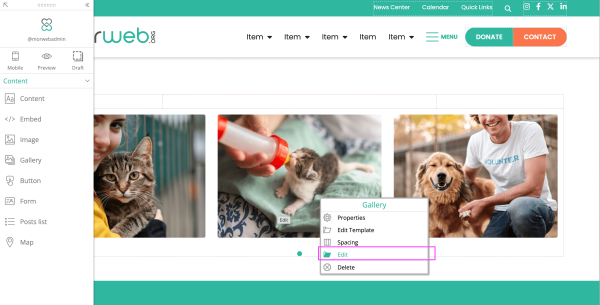
- To add or delete images, right-click the gallery and select Edit to reopen the gallery settings.
- To edit styles, right-click the gallery and select Properties to open the Template Layout window and adjust display options.
Troubleshooting Tips
- Gallery block not visible?
Refresh your browser or ensure you have permission to access the Page Manager; contact your site admin if needed.
- Images not displaying correctly?
Ensure that your uploaded images are optimized for web and not excessively large; re-upload if necessary and republish the page.
- Gallery not saving?
Double-check that you clicked Save and then Publish. If the issue persists, clear your site cache and try again.