How to Edit Image Descriptions
What You’ll Learn
How to add or edit an image description using the Media section of the Morweb backend.
Why It Matters
Editing image descriptions improves accessibility, helps with SEO, and ensures consistent visual presentation in galleries and sliders across your site.
Step-by-Step Instructions
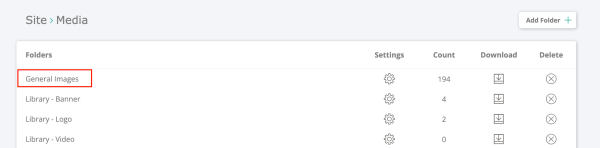
1. Go to Site > Media
- Log in to the backend of your website at www.domain.com/site
- From the top menu, click Site and then select Media.

2. Select the Gallery You Want to Edit
- Browse through your folders to locate the gallery that contains the image you want to edit.
- Click on the folder to view its contents.
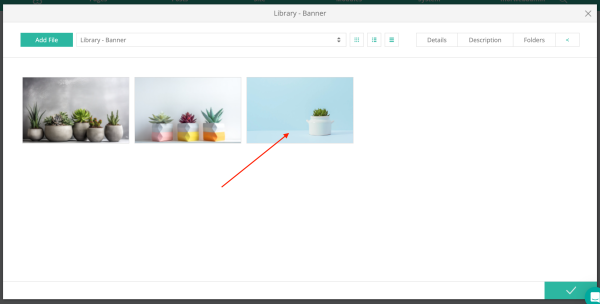
3. Select the Image You Want to Edit
- Click on the image thumbnail to open the image editor panel.
4. Go to the 'Description' Tab
- In the image editor, click the Description tab to view the editable fields.
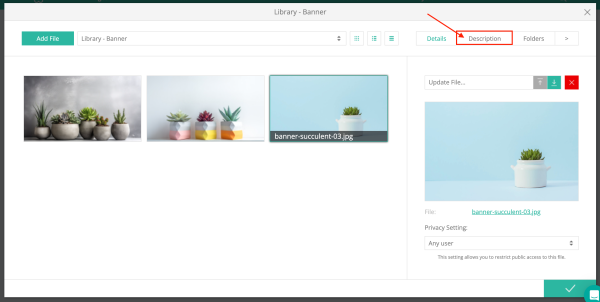
5. Add a Title, URL, and Description
- Enter a Title for the image.
- Enter a URL if you want the image to link to a page.
- Add a Description to appear as a caption or alt text depending on your template.
- Click Apply to save the changes.

Troubleshooting Tips
- The image editor doesn’t appear when I click a thumbnail.
Ensure you're selecting a valid image file (JPG, PNG, etc.) and that it's not inside a restricted folder.
- The description doesn’t show up on the image.
Some templates use image descriptions differently. Reach out to support if the field isn’t displaying as expected.