How to Upload and Manage Video Files in Morweb
What You’ll Learn
How to upload new video files and manage existing videos in the Morweb Media Library using the Media Manager.
Why It Matters
Uploading and managing video content helps bring your website to life. Well-organized videos improve engagement, storytelling, and SEO—providing visitors with a richer experience.
Step-by-Step Instructions
1. Add New Videos
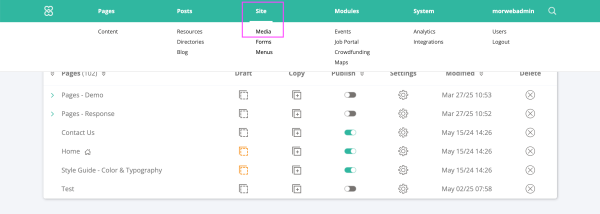
- Hover over the top navigation menu and click Site > Media to open the Media Manager.
- Click the folder where you want to add videos, or click the Add Folder button to create a new one.
- Name the folder, set privacy settings, and add a description if needed.
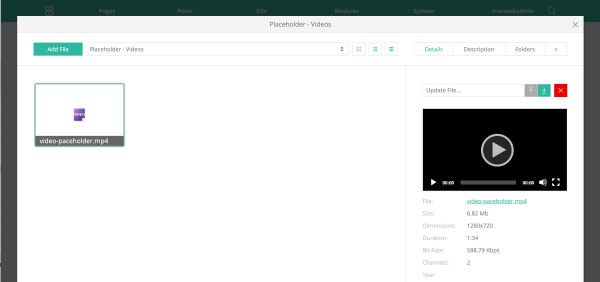
- In the pop-up window, click the green Add File button to upload videos. You can select multiple video files at once.
- Click the green Save button in the bottom right corner when you are finished uploading.
2. Manage Videos
- Click the video folder you want to manage.
- Click any video to view details such as file name, size, dimensions, duration, and more. You can also download or delete the video.
- Click the green Save button in the bottom right corner when you are finished making edits.
Troubleshooting Tips
- Media Manager not opening?
Refresh your browser or confirm that you have the correct permissions to access the Media Manager; contact your site admin if needed.
- Videos not uploading?
Verify that your video files are in a supported format (MP4, MOV, etc.) and under your site's maximum file size limit.
- Changes to video details not saving?
Be sure to click the green Save button after making edits. If problems continue, clear your site cache and try again.